About

One Brit, one American and three dogs on a journey to assess different gardening and growing styles, preserving, cooking and beginning a self sufficient lifestyle in Utah.

The Brit is an organic, no-dig, barefoot hippy hiker and the American is a traditional tiller of the garden and wears shoes when hiking.
Showing posts with label gardening. Show all posts

Monday, February 16, 2015

Mulching

Dear Readers,

Spring is arriving here in the valley early with the recent warm weather; the snowdrops and violets are in bloom in the leaf litter.  My thoughts are turning to what must be done in the garden before I move in with my other half.


When I took the property back in June last year, the original vegetable garden was over run with 6 foot high weeds, grass and associated critters.  After much hacking with shears, scythes, and the lawnmower over several weeks; I was able to knock everything down to a manageable height to dig it over and plant in.   Unfortunately, the weeds had run to seed and sprouted back up before I had a chance to get my plants in so I decided to cover the plot with mulch to suppress the hoard (of weeds) and to add some organic matter back into the soil.

I covered the plot with cardboard which I had acquired when relocating from NJ.  I simply flattened the boxes and overlapped them to ensure that the weeds would not push through and wet the card to keep in place.


I'm sure that you will agree, it is not the prettiest of sites to behold in the garden and since I am due an inspection from the rental company, I want to make sure that the vegetable patch is looking good.

The cardboard has done it's job over winter and has blocked out the sunlight and smothered the weeds.  Numerous worms are now seen in the soil breaking down the rotting weeds and improving the soil structure with their feeding.

I could cut holes in the cardboard and plant straight through with hardy crops such as peas or fava beans (that's broad beans to us Brits) but I'm going to cover with more mulch for aesthetics whilst I get plants started inside.

The mulches I have available from the garden include leaves, grass clippings, shredded dead plants and homemade compost.  I'm not wanting to spend any money if possible on the garden because I'm moving out and in with the other half but I do want to ensure that there are plants growing in the plot and the garden looks nice when the landlords return.


This is the shredded dead plant matter; weeds, blackberry prunings, tree and shrub prunings were left on concrete to dry out then were shredded.  A garden shredder/chipper would have been used if we had one but my other half was able to mow over this lot on one half of the vegetable plot to shred it.

To use, simply spread thickly where you want to mulch.  I'm obviously placing on top of the compost for the moment.

Shredded leaves; these were collected with the lawnmower to chop them up.  Use the same as the shredded plant matter.  I like to wet these types of mulches on the cardboard to reduce them blowing back around the yard.

Grass clippings; simply collect the clippings from the lawn and place on top of the cardboard or soil.  Grass clippings contain a lot of nitrogen which will help to decompose the cardboard over time.

Once the weather is definitely mild enough to plant and my plants are big enough and hardened off to cope with the weather and early pests; I simply move the top layer of mulch and cut the cardboard with a sharp knife in a cross shape and plant through.  You can ease the top layer of mulch around the plant to help retain moisture in the soil.

The downside to mulches such as cardboard is that slugs and snails tend to congregate underneath.  These mulches tend to sap up the nitrogen to decompose so give any plants you plant through a jolly good feed with nitrogen to help them get established.


Wednesday, February 11, 2015

Building a Tumbling Composter

Hello again,

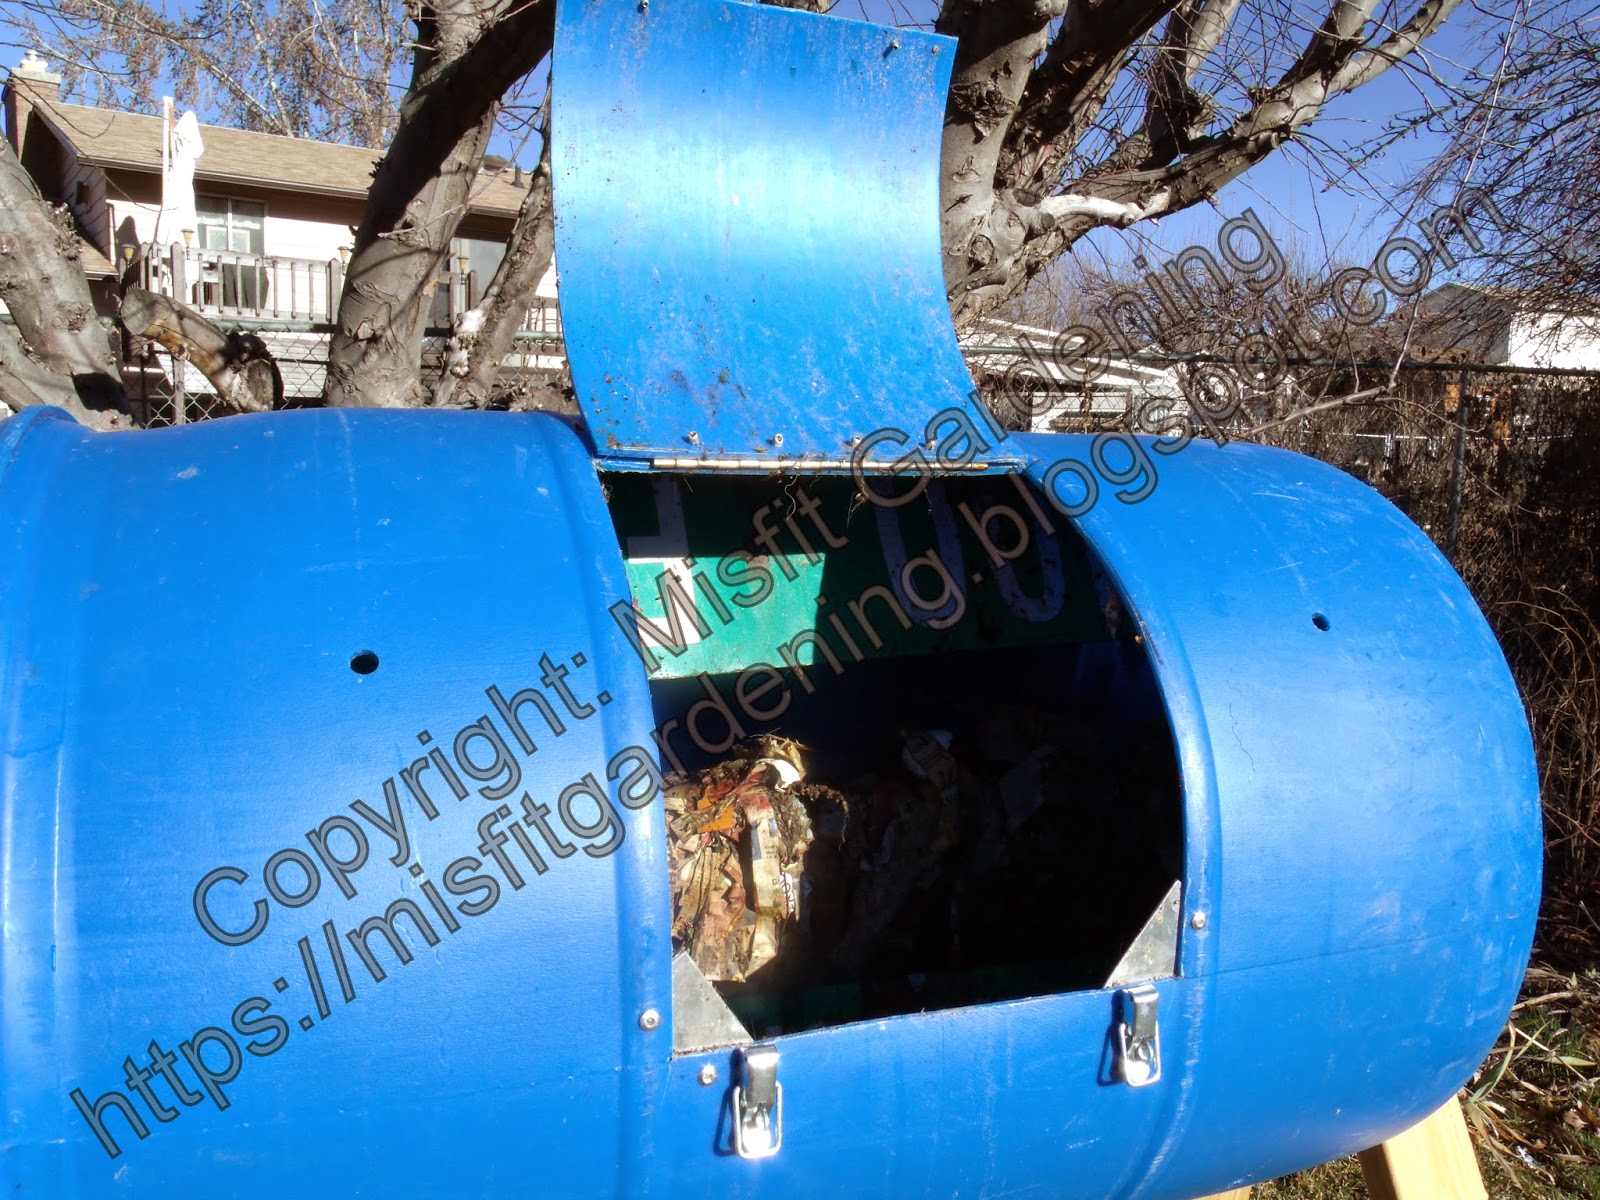
In this post I'd like to show you the tumbling composter that my other half made me.

As an organic gardener, compost is very important to me and the fertility of the soil and the nutrients of the produce we will harvest.


To make the composter you will need:

2x4 cut to the appropriate height (we wanted to fit a wheelbarrow underneath to collect the compost once ready)

2 sawhorse brackets

1 drum (we used a 55 gallon drum)

1 pipe long enough to go through the drum with overhang at each side

metal sheeting to make interior baffles to aid mixing (optional)

hinges

latches

screws/nuts/bolts

saw

drill

To build:

Drill plenty of air holes around the barrel and on the ends.  Don't make them too big or you will lose the compost as the barrel turns.

Cut a large hole at each end of the barrel so the supporting pipe will slot through.


Cut a door in the side to the size you want.  Think about what will be easiest for you to remove the finished compost.  Attach hinges and latches to close the door and keep it secure when turning.


Cut the 2x4 to the height that works for you.  We wanted to be high enough to fit a wheelbarrow underneath.  Slot the wood into the sawhorse brackets and screw to secure.

With some help, lift the barrel with the pole through into the top sawhorse bracket and open up to close.  The barrel should move freely.

Take care when filling the barrel and turning it when it contains material, it will get heavy. Take all precautions to operate the tumbling composter in a safe manner including appropriate positioning and securing of the system.


All content provided on this "Misfit Gardening" blog is for informational purposes only. The owner of this blog makes no representations as to the accuracy or completeness of any information on this site or found by following any link on this site.

The owner of misfitgardening.blogspot.com will not be liable for any errors or omissions in this information nor for the availability of this information. The owner will not be liable for any losses, injuries, or damages from the display or use of this information